Thursday, November 17, 2011

Steak and Peppers

Here is another entry from the kitchen of my fantastic sister. Although, as you'll see, she can't really take all the credit for this one. And although it isn't the most flavorful or most complex dish our father makes, it has been a family favorite for a long time.


This is probably one of my favorite dishes Dad makes.  It is a simple combination of steak, onions, carrots, and peppers with a soy sauce tang and some serious chili spice.  The peppers release a distinctive smell when you start them in the pan and the instant I smell it I know good things are coming!  

If you don't have a wok (embarrassingly enough I do not) a cast iron skillet does the job just fine.  The key is to stir, stir, stir the vegetables and not to touch the meat!  

First start the chilies in the pan to get that lovely spicy oil all through the cooking oil.  Do not dice the chilies, leave them whole and remove them before serving.  Now that my family is completely addicted to spicy food (and why we think it is awesome that Christopher can burn off your taste buds!) I use 3 whole dried chilies, but you could use just 1 or 2 if you are not a fan of that burning feeling on your lips. Next, add the grated ginger to the pan and cook for 30 seconds.

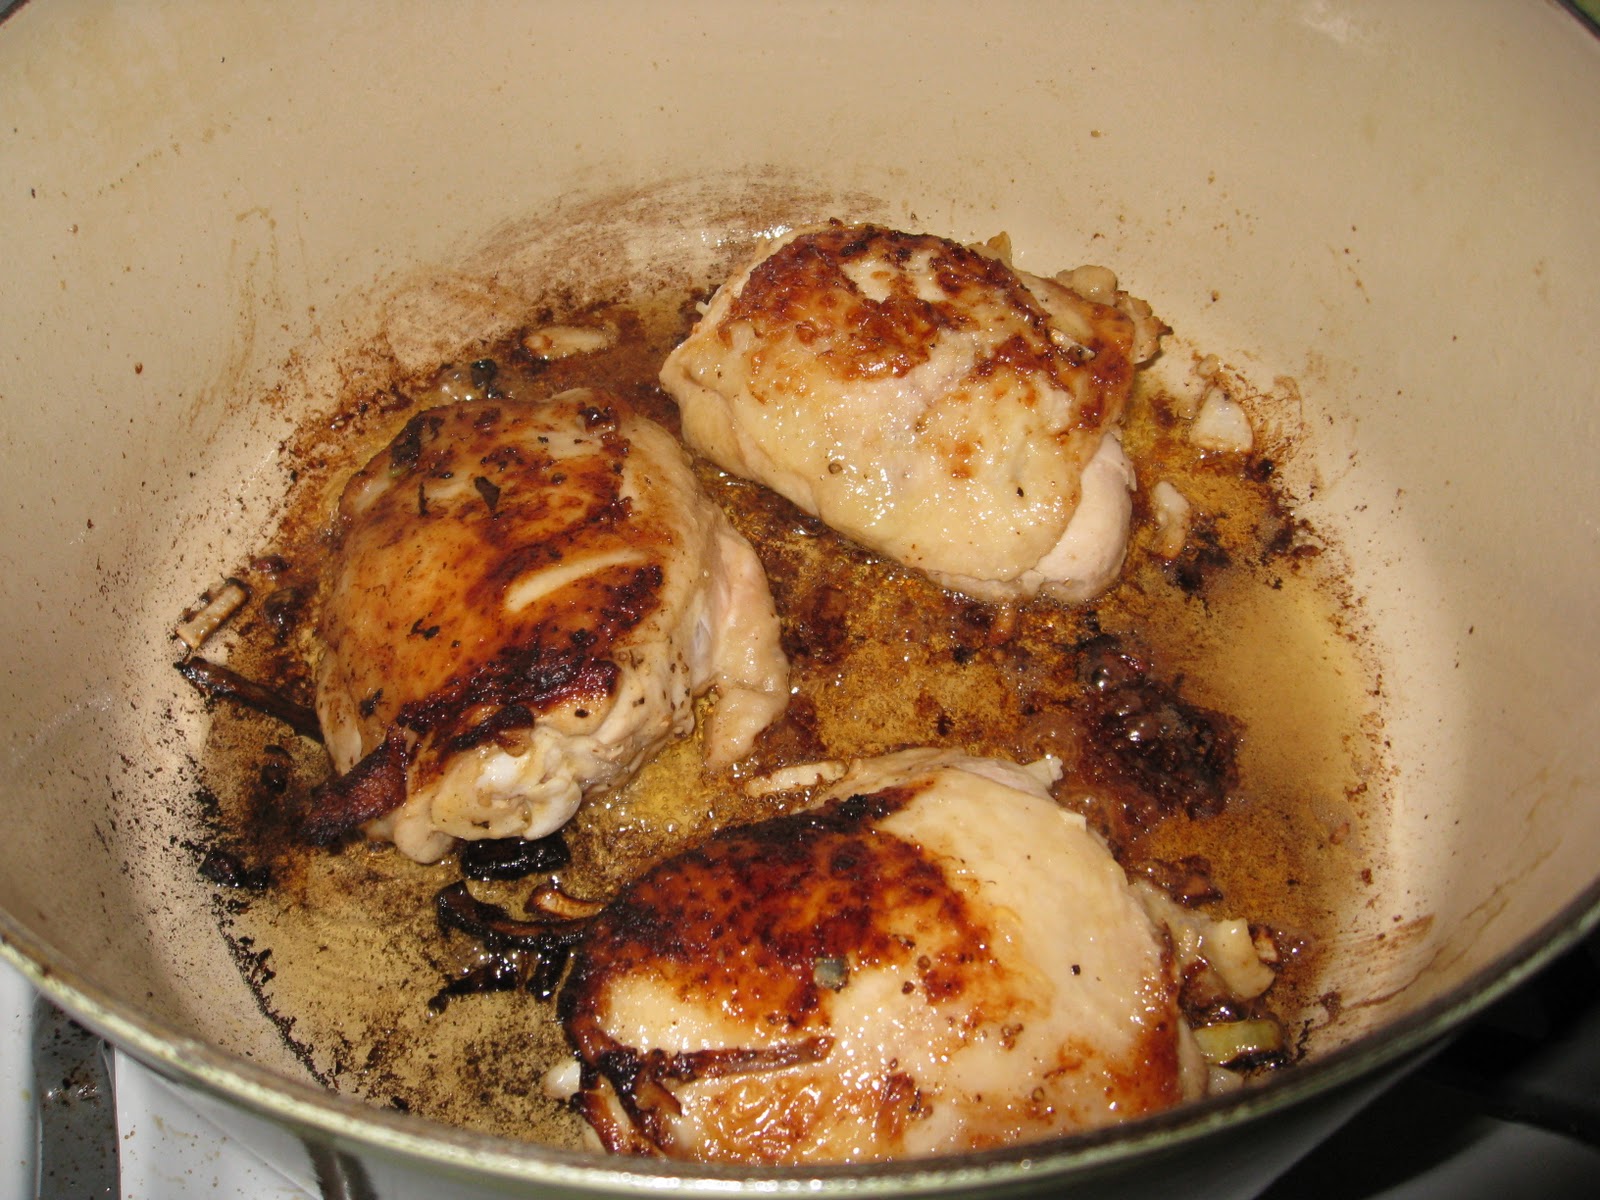
Then you sear the meat in the seasoned oil, turning/tossing once so that each side gets all caramelized and delicious.  Once each side is browned, remove the meat to a plate and add the vegetables to the pan. Order is important here, according to how you like your vegetables done.

I like my vegetables (with the exception of the onions) to be crunchy.  However you like them done, keep continuously tossing them to prevent burning since the pan is kept so hot.  I would start the carrots and bell peppers first, they take the longest to cook.  Cook for 3 minutes, then add the onion.  Cook the onion till it is translucent then add the meat back cooking till your veggies are done how you like them. *Note from Mae: often celery is added to this recipe, and it adds welcome crunch! Feel free to experiment with adding extra veggies, building from the base of peppers and onions.

Combine the soy sauce, water, and arrowroot then add to the pan.  Cook till the sauce thickens.  I like more sauce so I use ½ cup water.  Serve this on top of white or brown rice.

  • 1-3 chili peppers (if dried, soak in hot water to reconstitute)
  • 2 tsp grated ginger
  • ½ pound steak, cut into thin strips
  • 1 bell pepper, cut into thin strips
  • 1 carrot, cut into matchsticks
  • 1 medium onion, cut into thin strips
  • *1-2 stalks celery, sliced diagonally into 1/2" thick pieces
  • ¼ cup soy sauce
  • ¼ - ½ cup water
  • 1 Tbsp arrow root

Tuesday, November 15, 2011

Sweet Corn Fritters with Salsa Fresca

These wonderful sweet corn fritters are the perfect side for the three-bean vegetarian chili that was featured yesterday, or would be a fantastic brunch dish when paired with some eggs over-easy or scrambled eggs. They're hearty, but not too heavy and are practically a meal on their own!

Ingredients:

  • 10 oz frozen corn kernels (one bag), thawed
  • 3 fresh jalapeños, seeded and minced
  • 2 cloves garlic, minced
  • 1 red bell pepper, seeded and finely diced
  • 1 bunch green onions, including tops, thinly sliced
  • 2 eggs
  • 1 1/4 cups all purpose flour
  • 1/2 cup cornmeal
  • 1 tsp baking powder
  • juice of 1/2 lime
  • 1 1/2 cups milk
  • coconut oil for frying
  • sour cream and salsa fresca for serving
Combine corn, jalapeños, garlic, bell pepper and green onions in a large bowl and set aside. 
In a food processor, combine eggs, flour, cornmeal, baking powder, and lime juice. Pulse a few times to combine, and then and the milk. Process in pulses until a thin batter is formed, and then add to the vegetables. Let sit for at least 30 minutes before cooking.

Heat 2 Tbsp of oil in a large frying pan over med-high heat, spoon batter in to form fritters about 4" in diameter. Cook until golden, about 4 minutes on a side, turning once. 

Salsa Fresca:
This is a very simple recipe that is great for serving on chicken, with chips, as an accompaniment to chili, with eggs, or anywhere else you'd use salsa.

Ingredients:
  • 2 tomatoes, diced
  • 1/2 cup minced red onion
  • 1/2 jalapeño, seeded and minced 
  • juice of 1/2 lime
  • 1/4 cup chopped fresh cilantro
  • kosher salt and fresh cracked black pepper to taste
Combine all ingredients in a bowl, and poof! It's done :-)

Monday, November 14, 2011

Vegetarian Three Bean Chili

Honestly, I think that chili just might be the perfect fall food. This weekend we found ourselves outside working in the yard, since it was likely to be the last nice weather of the season (the weatherman is predicting snow later this week!). It was a serious attempt to get all of the necessary yard work done before we begin our winter hibernation in earnest. Even with the unseasonably warm weather we were enjoying, it was still only in the upper 40s and very windy, so coming inside to this hot meal was wonderful. Double bonus points becuase this chili has some heat to it. Not too much, because I was trying no to burn the dear husband's tastebuds off, but just enough kick.
If you like your food on the spicy side, give the recipe below a try. If you're more like my brother, whoI'm pretty sure snacks on whole scotch bonnet peppers and wouldn't consider ordering anything less than 4 iut of 5 peppers at the local Thai restuarant, then you may want to add a couple more serrano's or another 1/2 tsp of cayenne. If you like it mild, then swap the serranos for jalapenos and leave out the cayenne pepper altogether.
I served it with corn fritters, sour cream, shredded monterey jack and salsa fresca. See below for the the salsa fresca recipe and I'll post the corn fritter recipe tomorrow.
Ingredients:

  • 1 cup pinto beans
  • 1 cup navy beans
  • 1 cup kidney beans
  • 3 yellow onions, diced
  • 2 large serrano peppers, seeded and diced
  • 6 cloves garlic, minced
  • 4 Tbsp chili powder (I prefer Penzeys Spices Chili 9000)
  • 2 Tbsp ground cumin
  • 1/2 tsp cayenne pepper*
  • 1 tsp dried oregano
  • 3 15 oz cans crushed tomatoes
  • 6 tomato cans of water, plus additional if necessary
  • salt to taste, if desired
*I buy the extra hot cayenne, you may want to adjust amounts if yours is milder.
In large pot, combine all beans with enough water to cover by several inches. Bring to a boil, cover, and remove from heat. Leave covered for one hour. (Alternatively, soak beans overnight in water.)
In a large, heavy pot, I like to use my cast iron dutch oven for soup making, heat 3- 4 Tbsp olive oils over med heat. Add the onions and serrano peppers, reduce heat to low and cook for 10 min, or until onions are translucent. Then add garlic and spices and cook for two minutes more.
Add tomatoes and beans, and additional water. Bring to a simmer, and cook uncovered for 2 1/2 to 3 hours. If chili begins to get too dry, add more water. 

Serve with Salsa Fresca (recipe follows), shredded Monterey Jack and sour cream.
Salsa Fresca:
This is a very simple recipe that is great for serving on chicken, with chips, as an accompaniment to chili, with eggs, or just about anywhere else!
Ingredients:
  • 2 tomatoes, diced
  • 1/2 cup minced red onion
  • 1/2 jalapeño, seeded and minced 
  • juice of 1/2 lime
  • 1/4 cup chopped fresh cilantro
  • kosher salt and fresh cracked black pepper to taste
Combine all ingredients in a bowl, and poof! It's done :-)


Sunday, November 13, 2011

Upside-Down Berry Crostada


Every year, about the time that you realize fall is definitely, inexorably turning into winter, I get this undeniable urge to bake. There is something almost luxurious about coming inside from a windy day, when the mercury pokes above freezing - but only while the sun is shining, to something hot and sweet, fresh from the oven.
 Usually the case with me, is that I *attempt* to bake, and many phone calls to my sister later, and picture messages of my failures, she has diagnosed my problem and I am off and running with a working recipe (usually one completely different than I started with). Truly, I really am that rubbish at baking. I hate measuring thing so precisely, and trying to make things cookie cutter perfect, I'm a free-form kind of girl! This is why this recipe is so perfect, everything about it is approximate, and works with whatever fruit and berries you have on hand. The original is from Giada De Laurentis' show "Everyday Italian" and can be found here. An excellent alternative to the berry version here is to make a peach crostada with 5-6 cups fresh peaches.

Ingredients:

  • 1 1/2 cups all purpose flour
  • 4 Tbsp sugar, divided (2 + 2)
  • 1 lemon, zested and juiced
  • 1/4 tsp kosher salt
  • 10 Tbsp unsalted butter, chilled and cut into 1 Tbsp pieces
  • 3 Tbsp ice water
  • 10 oz frozen blueberries, thawed
  • 20 oz frozen blackberries, thawed
  • 10 oz frozen strawberries, thawed
  • 3 Tbsp cornstarch
  • 8 oz marscapone cheese
  • 1/2 cup heavy cream
  • 3 Tbsp honey
Prepare the crust 1 hour in advance. Combine flour, 2 Tbsp sugar, lemon zest and salt in a food processor. Add butter and pulse until a coarse meal is formed. Add ice water t 1 Tbsp at a time, until dough comes together. Remove from food processor bowl, form into a ball, wrap in plastic wrap and refrigerate ~1 hour.
Stir together the berries, lemon juice, 2 Tbsp sugar, and cornstarch. Place in approximately 10 inch baking dish (round or square).


Roll the crust out so that it will be ~2-4 inches larger than your baking dish. Place the crust over the berries and tuck the edges in so that it fits just inside the baking dish. Cut a slit in the center of the dough. Bake 50-60 minutes at 400F, until the crust is golden and the berries are bubbly.
Remove from the oven and allow to cool slightly before serving. While cooling prepare the marscapone whipped cream.
Whip the heavy cream until soft peaks from with an electric mixer. Add the marscapone and honey, continue to whip until nice peaks form.
Serve the crostada in bowls topped with the whipped marscapone.

Wednesday, November 9, 2011

Brunch Tortilla Pie

Welcome to another guest blogger! As you may remember from the first post, Andrew is famous for his fabulous and fabulously healthy dishes. Here is one that is sure to be a favorite!

This is a great recipe that I adapted from a Runner's World magazine article. It's very healthy, incorporated veggies and complex carbs and can be made vegetarian or with the ground meat of your choice. I've used it for brunch since it is very easy to make, looks good and is a fantastic all-day energy food!

Tortilla Pie

  • 1 Tbsp Olive Oil
  • 1 med onion, chopped
  • 1/2 cup celery stalk, chopped
  • 1 clove garlic, minced
  • 1 15-oz can yellow corn, drained
  • 1 15-oz can kidney beans, drained
  • 1 15-oz can black beans, drained
  • 1 15-oz small white beans, drained
  • 1 6-oz can tomato paste
  • 1 Tbsp taco seasoning
  • 1 Tbsp dried basil
  • 5 10-12 inch soft tortillas
  • 1 cup shredded cheddar cheese
  • optional: ground meat of your choice can be prepared with the onion, garlic and celery, I prefer chicken or turkey. Add a diced jalapeño for extra spice!
In a frying pan, heat oil and sauté the onions, garlic, celery and meat (if desired) until onions are transparent (and meat is cooked through). Add corn, beans, tomato paste and seasonings and heat thoroughly. Set two tablespoons of this mixture aside.
Place one tortilla on a baking sheet that was lightly coated with cooking spray, spoon a few tablespoons of the bean mix onto it; spread evenly. Place a second tortilla on top of the beans, add another few tablespoons of the bean mix and spread. Repeat the layering process until the pie is five layers high. Add two tablespoons water to the reserved bean mix and spread over the top of the pie, (this will prevent it from drying out during baking).
Bake at 350F for 35 minutes. Sprinkle with cheese and continue baking until cheese is melted. Let sit for 15 minutes, then cut into pie shaped servings. Serves six.

Serve with your favorite salsa, sour cream, extra cheese or guacamole!

Tiramisu Cheesecake (Lia's birthday cheesecakes, part deux)

As promised, here is Lia's second cheesecake recipe, and I think I would eat this one once a week if I could!

Tiramisu Cheesecake

For the Crust:

  • 1 12 once package lady finger cookies *
  • 4 Tbsp salted butter, melted
  • 2 Tbsp coffee flavored liqueur
For the Filling:
  • 2 Tbsp coffee flavored liqueur
  • 24 ounces cream cheese
  • 8 ounces marscapone cheese
  • 1 cup sugar
  • 2 eggs
  • 4 Tbsp all purpose flour
  • 1 ounce semisweet chocolate
1. Preheat oven to 350F. Place a pan of water in the bottom of the oven.
2. Crush the ladyfingers into fine crumbs, mix in the meld butter and moisten with 2 Tbsp coffee liquor. Press into an 8 or 9 inch springform pan.
3. In a large bowl, mix cream cheese, marscapone, and sugar until very smooth. Add liqueur and mix. Add in the eggs and flour, mix slowly, just until smooth. Because the consistency of the mascarpone can vary, if the battery is too thick, slowly add in a little cream if necessary. Do not over mix. Pour batter into crust.
4. Place on middle rack of oven and bake for 40 to 45 minutes, or just until set. Open oven door and turn off heat. Allow cake to cool in oven for 20 minutes. Remove to cooling rack and allow to finish cooling. Refrigerate at least 3 hours, or overnight.
5. Grate semisweet chocolate over the top just before serving.

*Use the hard ladyfinger cookies, not the sponge ones, they will be too soft for this recipe, even if stale.

Tuesday, November 8, 2011

Chocolate Chip Blondies

Robert sent this recipe for blondies along with the previous post's banana bread recipe, and I kind of wish that you could e-mail baked goods, because as I read his email, and looked at the photos he sent along with my cravings grew exponentially. And now, for your enjoyment:

'Yeah... Not sure why, but butterscotch-type things sound good to me in the fall. And I have no idea why I've been in a muffin shaped mood this week either. Here is a Williams-Sonoma recipe, with a few comments and tweaks (and photos) by me.'

-Robert

Blondies with Easter Chocolate Chips
original recipe

A cross between a chocolate chip cookie and a brownie, blondes and thought to have evolved from butterscotch confections and gingerbread. One of the first known recipes for blondes appeared in an 1896 cookbook.


Ingredients:

  • 16 Tbsp (2 sticks) unsalted butter, at room temperature (I use margarine)
  • 1 3/4 cups firmly packed dark brown sugar (light brown sugar also works, but the flavor is richer with dark brown)
  • 1 1/2 tsp vanilla extract
  • 3 eggs
  • 2 1/4 cups all purpose flour
  • 1 tsp baking powder
  • 3/4 salt
  • 12 oz Easter chocolate chips* (I doubt these even exist anymore - I use 2 cups of "normal" semi-sweet chocolate chips


Directions:
1. Preheat oven to 350F. Lightly spray a 9x13 inch baking pan with non-stick cooking spray. (Alternately, this recipe will make about 18 muffins).
2. In a food processor, combine butter, brown sugar and vanilla until well combined, about 1 minute, stopping to occasionally scrape down the sides of the bowl.
3. Add the eggs one at a time, and pulse for 2 seconds after each addition.
4. Sift the flour, baking powder and slat in directly onto the butter mixture and pulse 10 times, 2 seconds per pulse.
5. Transfer the batter to a bowl and fold int eh chocolate chips.
**I use my Kitchen Aid Mixer for this recipe. I cream the butter, sugar and vanilla at high speed, add the eggs all at once, and then use the "Stir" setting to mix in the dry ingredients. Yes, this includes the chocolate chips.
6. Spoon the batter into the prepared pan and spread evenly. Bake until the blondes are golden brown and the edges are firm to the touch, 30-35 minutes. If making muffins, these will take 20-25 minutes.
7. Transfer the pan to a wire rack and let cool completely, about 1 hour, and then cut into bars. Makes about 20 blondies.
Note: the blondies can be baked in two 9 inch square pans as well. Bake these for 20-25 minutes.


Monday, November 7, 2011

Erna Dangel's Banana Bread

Drumroll please... we have recipes from Robert to share!

Robert's baking is... wait for it... Legendary. The man is ridiculously talented with dairy fat and vanilla, and also the first person ever to satisfactorily explain to this scientist why one might choose to use butter vs. lard vs. shortening in a given baked goods recipe. I felt like it should have been taped as an episode of "Good Eats" or something.

Robert also has a great blog you should mosey on over and explore, preferably with something scrumptious in hand. Topics vary wildly, from the weather (always a favorite midwestern topic), to current events, to food, and my favorite label "better than a frozen fish fight". You can find out what's currently on Robert's mind at Robert's Random Writings or http://robertsrandomwritings.blogspot.com. It's also conveniently located in the blog list over here ---> on the right hand side of this page. Did I give you enough navigation options?


And now, what you all have been waiting for since you saw the title of this post, the recipe for one Erna Dangel's Banana Bread. But who is Erna Dangel? According to Robert, she is a woman from his home town. He says "My mom got this recipe from Erna Dangel many many years ago, but her name is still attached to it in my personal cookbook." And so, Erna Dangel's Banana Bread it remains.

Also, don't get grossed out by the idea of really black bananas, really, the blacker they are for this the better. You want them to be extra soft, because they count as part of the liquid ingredients for this recipe (grossed out yet are ya?)

  • 1 cup white sugar
  • 1/2 cup margarine
  • 2 eggs
  • 3 bananas (the blacker, the better) *I know what you're thinking, Robert's bananas don't look very black, do they? In fact, they look good enough to eat plain! ;-)
  • 2 cups flour
  • 1/2 tsp salt
  • 1 tsp baking soda
  • cinnamon (and/or other spices) to taste
1. preheat oven to 350F
2. prepare 2 8"x3" loaf pans by rubbing the side with the margarine wrappers and then coating them with a fine dusting of flour. (Or, since this is the 21st century, use a good non-stick baking spray.) If making muffins, this recipe makes about 2 dozen, so prepare pans accordingly.
3. In a mixing bowl, cream together sugar, margarine, eggs and bananas.
4. Stir in flour, salt and baking soda. (If you are using an electric mixer, use the lowest setting, stopping as soon as the ingredients are incorporated. The batter will probably be a little lumpy.)
5. Add cinnamon, tasting it as you add until you like the taste - remember that come of the flavor will "bake out" so add a little bit extra. I usually use about 2 tsp of cinnamon.
6. Bake at 350F until the top is brown and a toothpick inserted into the middle comes out clean. (For loaves, I would check in about 30 minutes, but they may take as much as 50 minutes. Muffins I start checking at 20 minutes and they are usually done around 23-25 minutes.)
7. Let cool on a rack until the bottoms of the pans are only slightly warm to the touch.
8. If making loaves, cut around the edge of the pans with a knife and then flip the loaves out onto the rack.

Saturday, November 5, 2011

Yassa Poulet (Senegalese Chicken and Onions)

When I lived in Senegal, this dish was my comfort food. It starts with pieces of pan fried chicken, is cooked with a delicious onion sauce and then the whole thing is served over rice. The very best version came from this small restaurant in the old town of Saint Louis called La Linguère. The ride into town from université  and the walk across the Pont Faidherbe was more than worth it for this meal alone! It was just a bonus if you managed to get any other errands done at the same time. The dish is a simple one, marrying flavors of onion, habanero, mustard, and lemon. La Linguère offered Yassa Poulet and Yassa Poisson most days of the week, both equally delicious, but I've not been able to find a fish substitution that I like as well as what I had in Senegal, so I stick to making the chicken at home.


 Typically this is just served simply with white rice, but I find it goes equally as well with a green salad. Here is the yassa plated with my winter kale salad. Totally scrumptious!

You can prepare the marinade up to the night before if you like. I like to use only dark meat chicken for this recipe, but a whole cut up fryer chicken also works well.
  • 1 cut up fryer chicken or family size package of chicken thighs
  • 4-5 large yellow onions, cut into thin slices
  • 4 cloves of garlic, minced
  • peanut oil for cooking the chicken
  • hot peppers to taste (I use 2 habaneros, unless I'm cooking for company, then I'll use two serranos or two jalapeños, depending on their tastes)
  • red wine vinegar
  • spicy dijon mustard
  • black pepper
  • juice of two lemons
  • Maggi seasoning and a chicken bouillion cube* 
*I don't do MSG, which is loaded in these ingredients, so I just skip them. The dish doesn't have quite the same depth of flavor as what I remember having in Senegal, but I think it tastes great anyway. Feel free to experiment with the bouillon and Maggi if you like the taste.

Combine 1/4 cup dijon mustard, 1-2 Tbsp peanut oil, lemon juice, black pepper, minced garlic, 1 sliced onion and 1-2 tsp of red wine vinegar in a medium bowl. Add chicken to this mixture and marinate as long as desired (at least a few hours).


When finished marinating, remove chicken pieces and brown in peanut oil in a large cast iron pot, a few at a time to avoid crowding the pan.


 Remove the chicken, set aside on a plate. Reduce heat and add the onions to the pan. It is important to cook them for a long time over med-low heat to get the flavor. Once these onions have begun to caramelize (will take about 45 min) add in the onion that marinated with the chicken and all the sauce. Add in the desired hot peppers, and Maggi and bouillon cube if desired. Allow to simmer over med-low heat for an additional 30 min or more. Taste and adjust seasoning if desired. Add chicken back in to onion sauce 20 minutes or more before serving.


Winter Kale Salad

This is a variation on the first raw kale salad that I ever tried, and to this day it is one of my favorites. My friend Julie is a wonderful cook, and she made this for a Christmas party she hosted at her house. The fresh green flavor of the kale, couples so well with the crunchy carrots and vegetables, and the sweet pomegranate seeds make the whole dish seem somehow decadent. Additionally, the contrast between the green vegetables, orange carrots and bright red pomegranate seeds also makes this a brilliantly festive salad to serve at the holidays.

This salad is so versatile, please feel free to experiment with whatever vegetables you like to add. I've posted a winter and a summer version to take advantage of some of my favorite fruits when they are in season. Adding bell peppers, green onions, dried fruits, celery, or anything crunchy is a great way to make this dish your own.


Ingredients:

  • 2 bunches kale, washed, stems removed and chopped into bite size pieces
  • 2 carrots, diced
  • 1/2 cucumber, chopped
  • seeds from 1 pomegranate
  • 1 avocado
  • juice of 1/2 lemon
  • pinch of sea salt
  • optional: add pistachios, sunflower seeds, pine nuts or almond slices
Directions:
1. sprinkle salt and lemon juice over kale add, avocado
2. massage avocado into kale for 2 minutes with your hands, kale will soften and reduce in volume by about 1/3
3. stir in carrots and cucumber, taste and add salt or lemon juice if desired
4. spread pomegranate seeds over the top

Kale salad before being dressed with avocado and lemon juice. 

Friday, November 4, 2011

Red Velvet Cheesecake (or Birthday Cheesecakes Part 1)

What I like about this recipe is that it has the cocoa powder, buttermilk, vinegar, and red food coloring in it, just like a traditional red velvet cake, so it maintains a good degree of authenticity. In addition, this recipe features a cream cheese frosting as well. The chocolate graham cracker crust is easy and is a nice color contrast to the vivid red of the cheesecake and fluffy white frosting. Enjoy!

Red Velvet Cheesecake
From Southern Living

For the Crust:

  • 1 1/2 cups chocolate graham cracker crumbs
  • 1/4 cup unsalted butter, melted
  • 1 Tbsp sugar
For the Cheesecake:
  • 24 ounces cream cheese, softened
  • 1 1/2 cups sugar
  • 4 large eggs, lightly beaten
  • 3 Tbsp unsweetened cocoa powder
  • 1 cup sour cream
  • 1/2 c buttermilk
  • 2 tsp vanilla extract
  • 1 tsp distilled white vinegar
  • 2 ounces red food coloring
For the Frosting:
  • 3 ounces cream cheese, softened
  • 1/4 cup unsalted butter, softened
  • 2 cups powdered sugar
  • 1 tsp vanilla extract
1. Stir together graham cracker cubs, melted butter and 1 Tbsp sugar; press into bottom of a 9-inch spring from pan.
2. Beat together 24 ounces of cream cheese and 1 1/2 cups sugar at medium-low speed with electric mixer for 1 minute. Add eggs, cocoa powder, sour cream, buttermilk, vanilla extract, vinegar and food coloring, mixing on low speed just until fully combined. Pour batter into prepared crust.
3. Bake at 325F for 10 minutes; reduce heat to 300 degrees and bake for 1 hour and 15 minutes, or until center is firm. Run knife along outer edge of cheesecake, turn oven off. Let cheesecake stand in oven for 30 minutes. Remove from oven, cool on wire rack for 30 minutes. Cover and chill for at least 8 hours.
4. Beat 3 ounces cream cheese and 1/4 cup butter at medium speed with an electric mixer until smooth. Gradually add powdered sugar and vanilla, beating until smooth. Spread evenly over top of cheesecake. Remove sides of springform pan.

Into to Lia and Birthday Cheesecakes

Well, another chef has thrown her, um, springform pan, into the kitchen. Her name is Lia, and she makes a mean cheesecake! Here is her introduction to her recipes:

I love to bake and cook, so any time I get an excuse to do so, I take it and run. For example, my birthday is December 23 (yes, I'm a Christmas baby) and every year I would wait and hope that mom would make me a birthday cake. And just about every year my cake was either left unmade, or shared with dad's birthday (on January 4). I know it sounds a bit like I am complaining, and I guess that is because I am!

So last year, I decided to just make my own birthday cake. If I want one so bad, then I should just make it myself. This is my excuse! I'm taking it and running with it. I decided to make cheesecake, since it is really awesome, and when made properly, DELICIOUS!!! I love red velvet cake, and the tiramisu my grandma makes, so choosing the types of cheesecakes to make for my birthday cake was pretty obvious. It took a lot of research and pouring through countless recipes to come up with these versions, I hope that you enjoy them!

Since I had to work every day before my birthday I had to make the cheesecakes after work, meaning I passed a few late nights to make sure they were done in time for my birthday. But since they turned out so fantastically, it was definitely worth it. I ended up bringing the cheesecakes to work as a birthday treat to share with my coworkers and they were a huge hit! Every piece was gone before the end of the day! I was even asked by multiple colleagues to bring more for the next day, I'm sorry to say that I had to let them down because that just wasn't happening. They were just going to have to wait until next year. But my birthday is coming up next month, and I've already decided on this year's cheesecakes :-) But you'll have to wait until another day for those recipes.

Wednesday, November 2, 2011

Fresh Spring Rolls with Steak and Shiitake Mushrooms

Fresh spring rolls are one of my favorite meals to make. They are great for any season, and with a few staple ingredients, you can pretty much throw whatever you have left in the refrigerator into them. 


You will need a few special ingredients in order to make the spring rolls: spring roll wrappers, bean thread noodles, pickled sushi ginger and sweet chili sauce can all be found in the Asian section of your local mega-grocery. I like to wrap the ginger up in the spring rolls for extra flavor, but feel free to skip this if you aren't a fan of the flavor.

Making spring rolls successfully is all about the prep work, once everything is set up, the assembly will go smoothly.
  •  Soak 1/2 package of bean thread noodles in hot water until soft, drain, and cut up with scissors. Set aside.
  • Find a large, flat container for soaking the spring roll wrappers. Fill with hot water. When ready to assemble, soak the wrappers and make the spring rolls one at a time.
  •  Slice veggies into matchstick pieces, I like to use a carrot, 1/2 bell pepper, green onions, and 1/2 avocado
  • Slice 1/2 cucumber into thin rounds
  • Slice shiitake mushrooms, used sautéed or raw (I prefer sautéed)
  • Slice leftover steak into 1/4" thick slices
  • Trim stems off 1/2 bunch of cilantro
1. Soak one wrapper until soft
2. Lay cucumber slices across middle of wrapper near one end
3. Arrange a small amount of noodles, veggies, meat and cilantro over cucumbers. Add pickled ginger if desired.
4. Begin rolling wrapper, folding in ends as you continue to roll.
5. Serve with sweet chili sauce.

Modifications:
Serve without meat, adding extra veggies (more of the same or increased variety). Make salad rolls by omitting noodles and using leaf lettuce instead. If you choose to make salad rolls, I suggest using a double layer of wrappers, and use extra care when wrapping to keep the spring rolls from splitting.


Tuesday, November 1, 2011

Raspberry Cream Cake

I told you that my sister Elizabeth was the one who you wanted to bring the cake, and this recipe is the reason why (IMHO). There is a fancy-pants bakery near her apartment that makes this divine multi-layered torte, with layers of butter cream, whipped cream and raspberries. One year for my birthday she set out to create her own version of this delicious dessert, and I think that the result is even better than the original! I strongly recommend sitting down with a slice of this cake, a cappuccino and a good book. You won't regret the indulgence.

Raspberry Cream Cake
For the Sponge Cake

  • 4 eggs
  • 2 cups granulated sugar
  • 1/2 tsp salt
  • 2 tsp vanilla
  • 1/4 cup unsalted butter, melted
  • 1 cup boiling milk
  • 2 cups all purpose flour
  • 2 tsp baking powder
1. Preheat oven to 350F
2. Beat eggs until very light, then beat in sugar, salt and vanilla. Beat in melted butter and boiling milk.
3. Sift together flour and baking powder, beat in to liquids quickly.
4. Immediately pour into greased and floured 9 inch cake pans (two).
5. Bake at 350 degrees for 25-30 minutes. When done, it will be golden brown and will spring back to the touch.

For the Butter Cream Frosting

  • 1/4 cup Crisco
  • 1/4 cup butter (unsalted)
  • 1/2 tsp vanilla
  • 2 cups powdered sugar
  • 1-3 Tbsp milk, added one at a time
1. Cream together Crisco, butter and vanilla.
2. Add sugar.
3. Add mile 1 Tbsp at a time, until frosting reaches spreadable consistency.

For Whipped Cream

  • 1 1/2 pints heavy whipping cream
  • powdered sugar to taste
  • vanilla to tast
Beat all ingredients together until very stiff.

Raspberry topping: 1/2 jar of room temperature raspberry jam
Fresh raspberries for garnish.

Assembly:
1. Place one 9" layer cake on cake tray.
2. Cover top with 1/4" later of buttercream frosting.
3. Cover top with thin layer of raspberry jam.
4. Cover with 1/2" layer of whipped cream.
5. Place second layer cake on, and repeat steps 2 and 3 (leaving jam exposed on top of cake).
6. Completely coat the sides of the cake with whipped cream. Pipe around edge of top of cake with star tip if desired.
7. Add raspberries to top of cake for garnish.

Sorry about the lack of photos, apparently we devoured this before we could managed to take any good pics! I guess that means we'll just have to make it again soon, and I see absolutely no problem with that.